This guide will show you how to use a push button to toggle an LCD screen’s backlight on for a set amount of time and then turn itself back off, as can be seen in the demo video below.
The wiring of the circuit to enable us to control the HD44780’s backlight using a push button will be based on the wiring in my previous guide on Using a JHD162A LCD Screen with an Arduino Uno. Before continuing, build up the circuit described in the previous guide, as this one will walk you through the required modifications.
The things we will need in order to make the modifications are:
- 1 x 1k ohm resistor
- 1 x 2-pin push button
- A few jumper cables
The first thing we need to do is alter the connection that was previously made from pin 15 of the LCD module to 5v. This pin is responsible for powering the back light of the screen and is the one we will use to toggle the backlight as we require. Keep the resistor in place that we previously used, but instead of going to 5v, wire it up to analogue pin 4 (labelled A4 on the Arduino).
Next, we need to hook up the push button; start by wiring one of the pins on the button directly to 5v. The other pin needs to connect to digital pin 8 on the Arduino on one side, and on the other side needs to connect to GND via a 1k ohm resistor.
Your circuit should now look something like this:
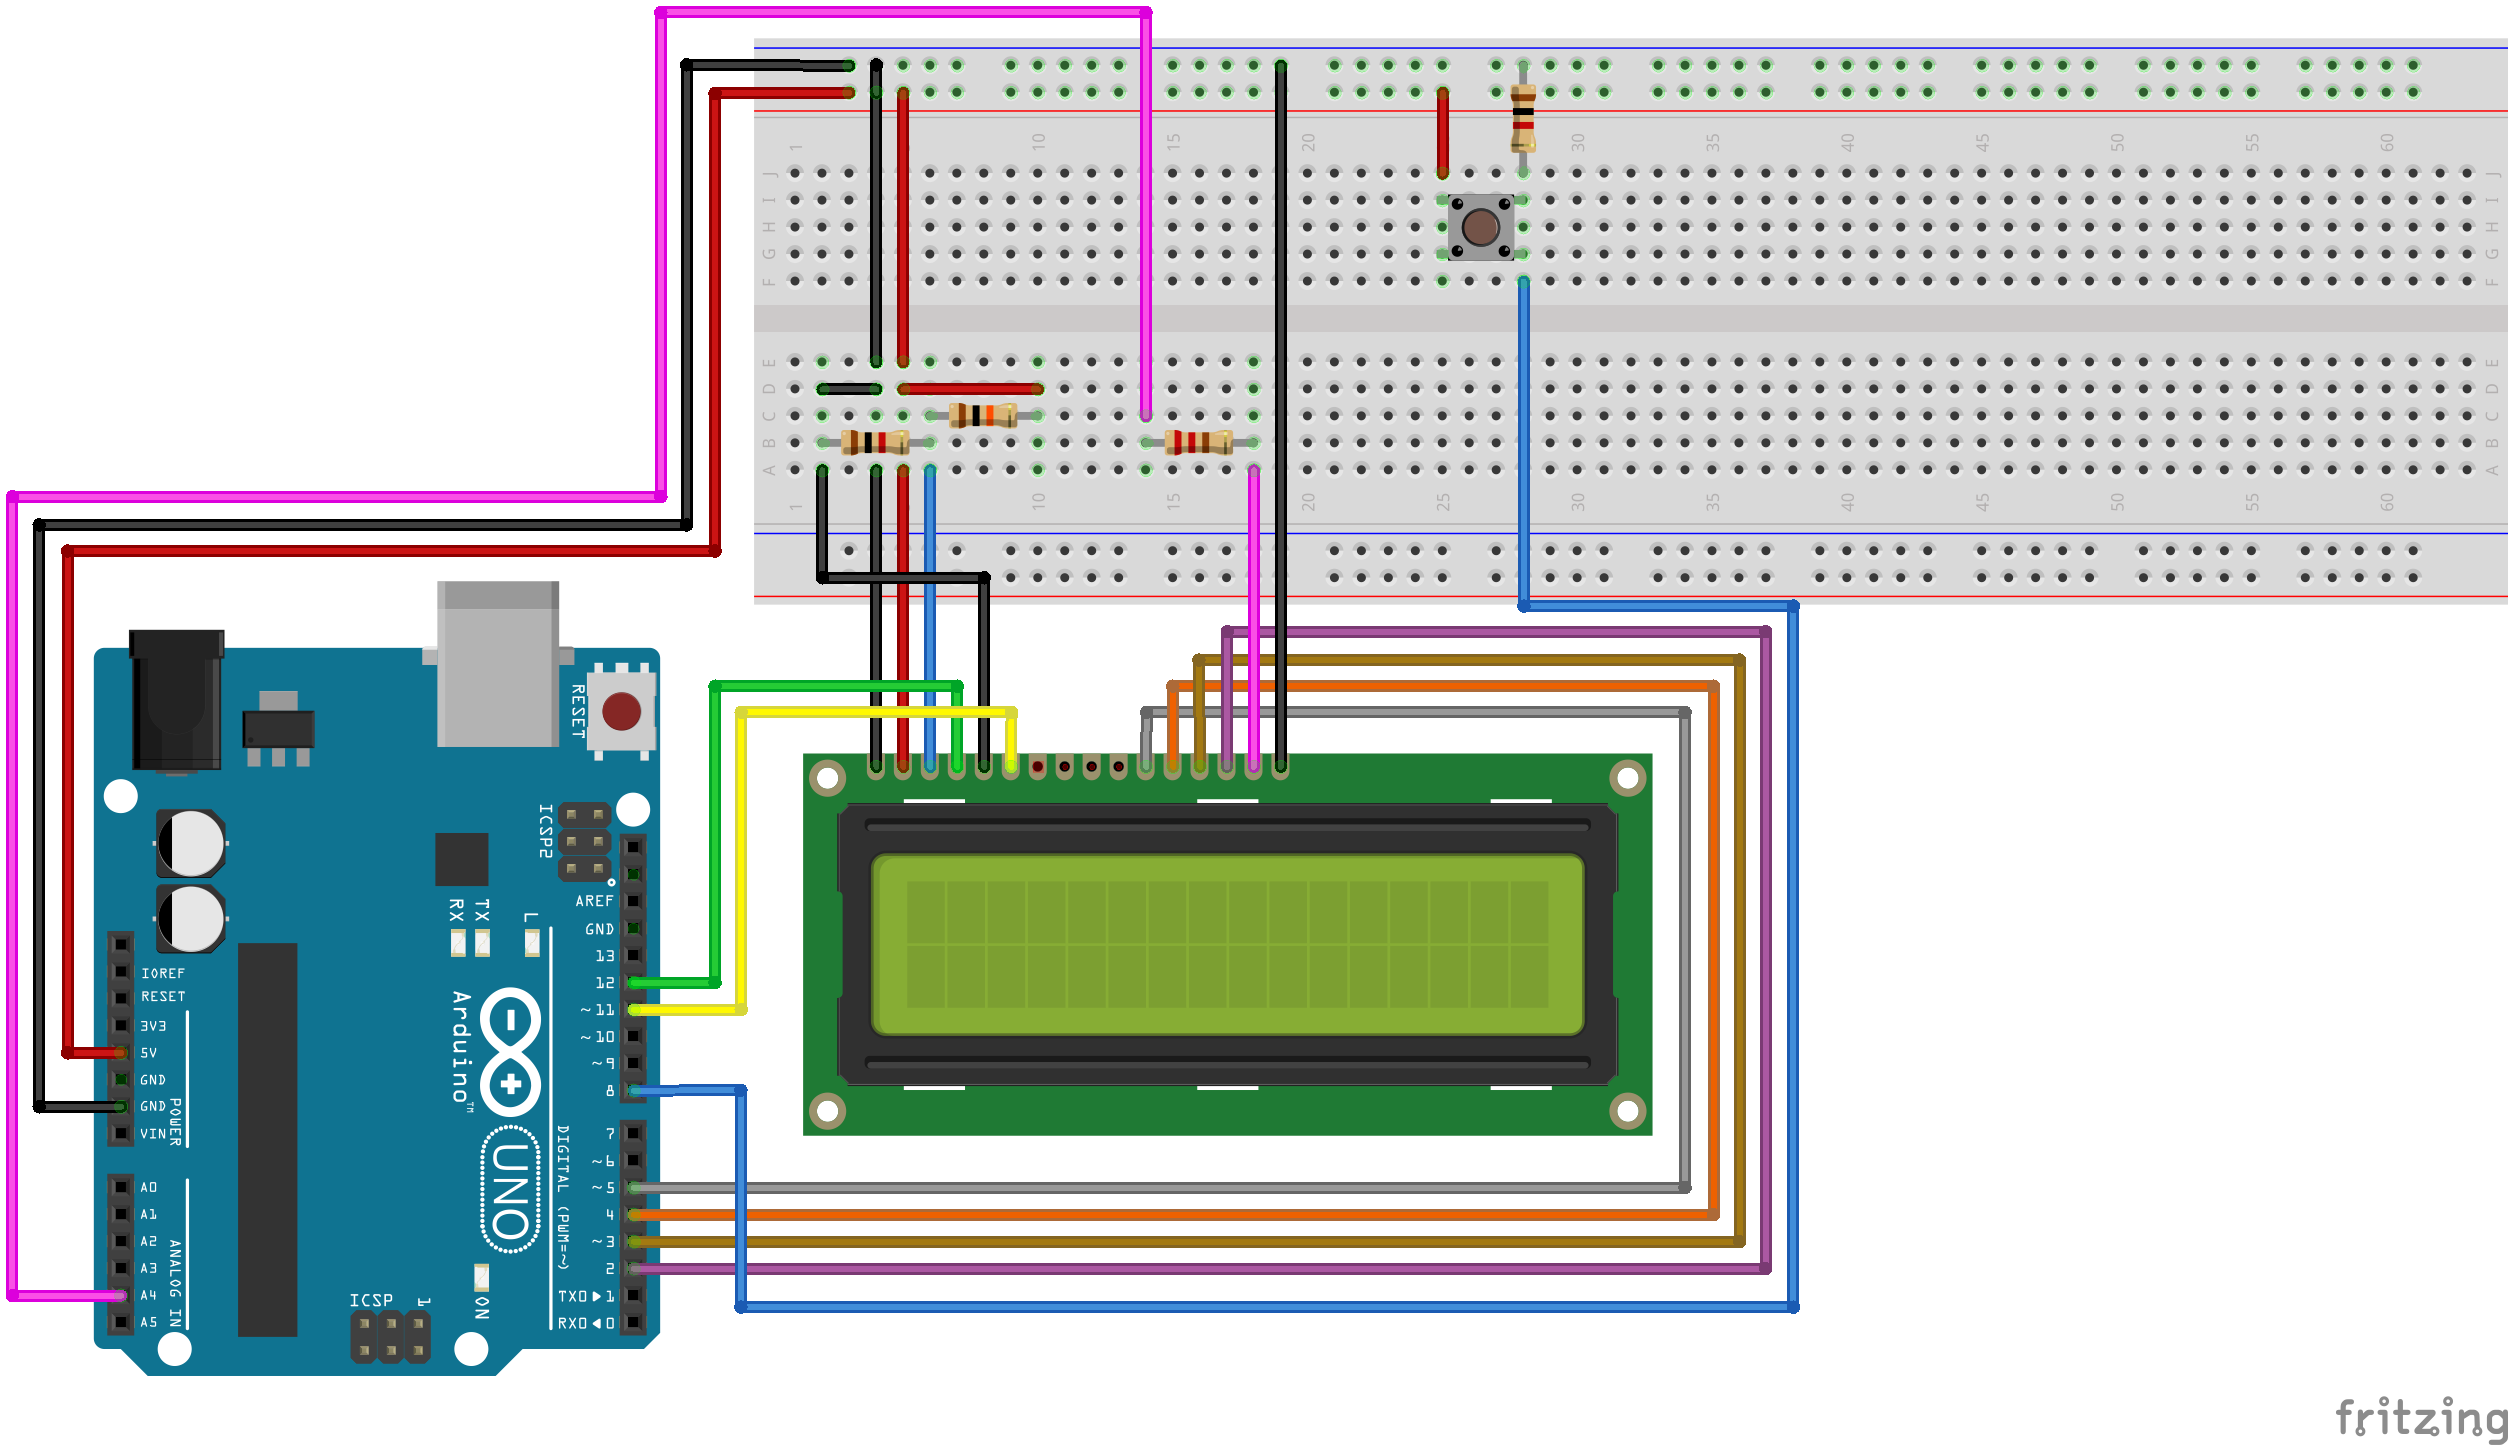
The alteration we made for the LCD backlight pin can be seen by following the pink wire, and the addition of the button can be seen by following the blue wire connected to digital pin 8.
Now, load up the Arduino IDE and copy and paste in the following sketch:
#include <LiquidCrystal.h>

#define LCD_LIGHT_PIN A4
const int buttonPin = 8;
LiquidCrystal lcd(12, 11, 5, 4, 3, 2);
int buttonState = 0;

void setup() {
  // Setup the number of columns and rows that are available on the LCD.
  lcd.begin(16, 2);
  lcd.noDisplay();

  // Set the button pin as an input.
  pinMode(buttonPin, INPUT);

   // Set the LCD display backlight pin as an output.
  pinMode(LCD_LIGHT_PIN, OUTPUT);

  // Turn off the LCD backlight.
  digitalWrite(LCD_LIGHT_PIN, LOW);
}

void loop() {
  buttonState = digitalRead(buttonPin);
  if (buttonState == HIGH)
  {
    // Print some text to the LCD.
    lcd.clear();
    lcd.setCursor(0, 0);
    lcd.print("rastating.com");

    // Turn the backlight on.
    digitalWrite(LCD_LIGHT_PIN, HIGH);

    // Display the text on the LCD.
    lcd.display();

    // Wait for 10 seconds and then turn off the display and backlight.
    delay(10000);
    lcd.noDisplay();
    digitalWrite(LCD_LIGHT_PIN, LOW);
  }
}
Upload this sketch to your Arduino and you’ll now be able to enable the LCD screen by clicking the button.