The JHD162A display controller is a monochrome LCD module which you can find bundled with various Arduino starter kits or on their own; usually in the price range of around $10.
Note: Although this guide has been written with the JHD162A in mind, any LCD display controller that is compatible with the Hitachi HD44780 interface will work; which is the majority of small display controllers like this.
The checklist of things we’ll need for this are:
- An Arduino Uno
- A HD44780 compatible LCD controller
- A 1k ohm resistor
- A 10k ohm resistor
- A 220 ohm resistor
- A breadboard and a bunch of jumper cables
The first thing you will need to do, more than likely, is solder the headers to the JHD162A module, as typically they do not come ready soldered together. Once you are able to connect it to your breadboard, it’s time to wire it all up as per the illustration and instructions below:
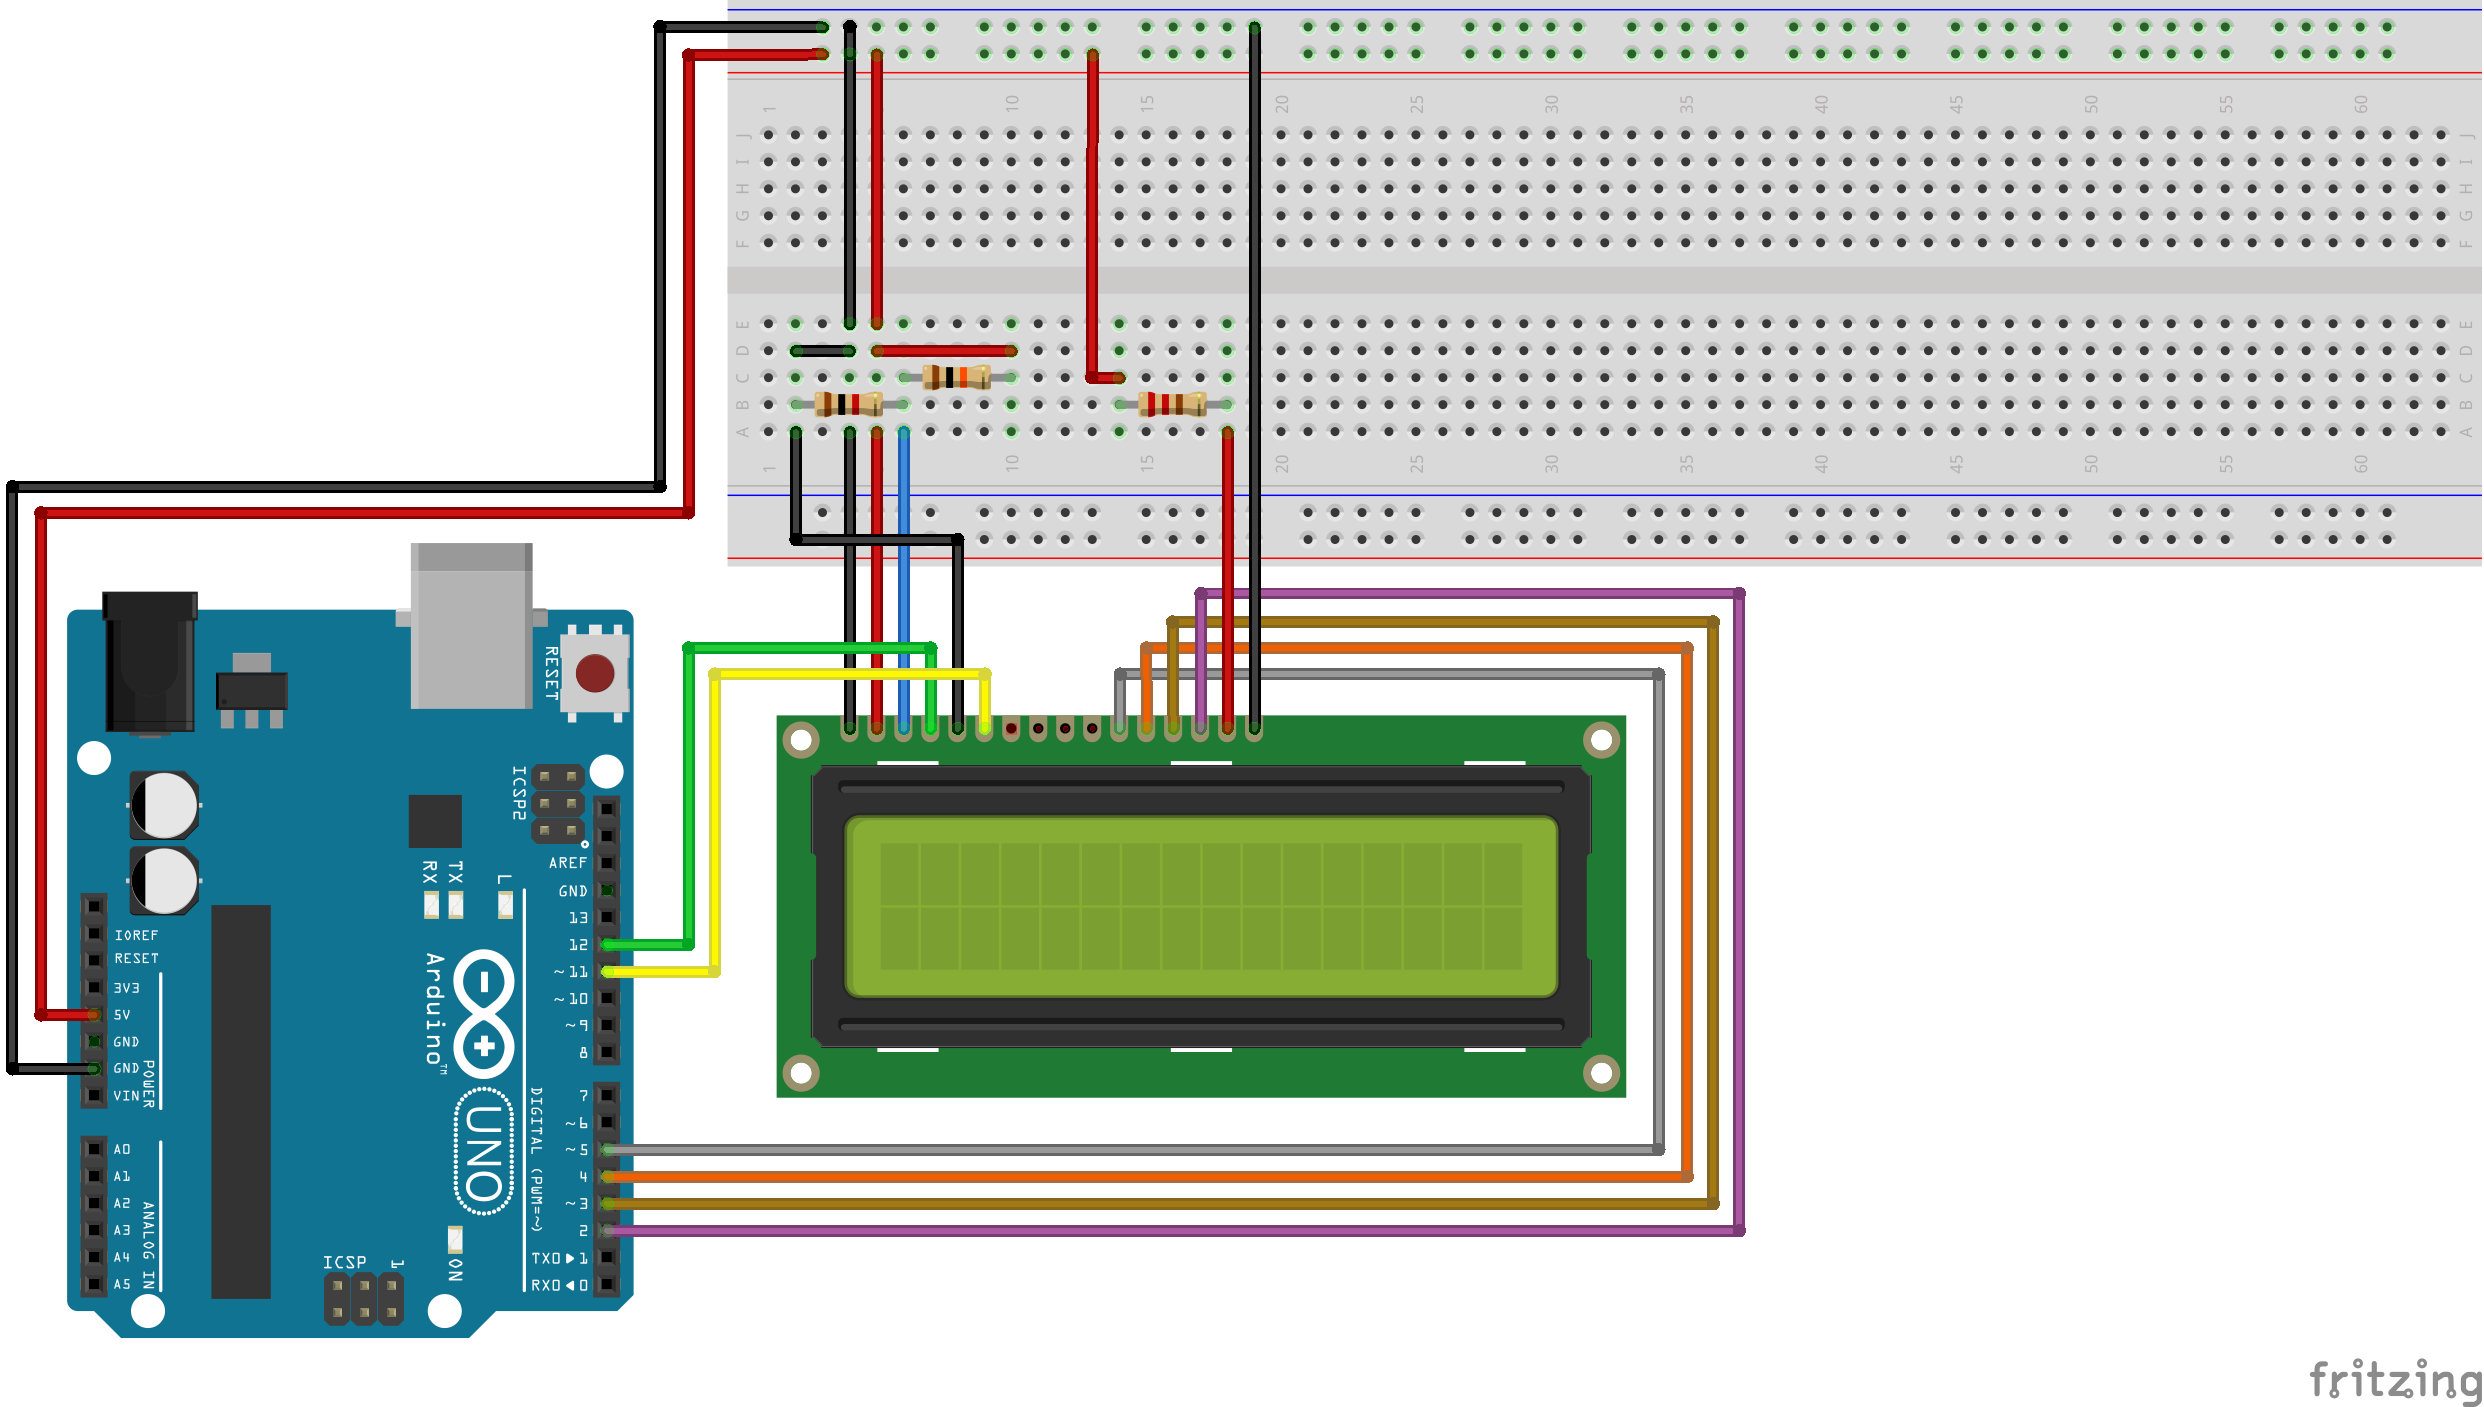
- Pin 1 to GND
- Pin 2 to 5v
- Pin 3 to GND through a 1k ohm resistor and to 5v through a 10k ohm resistor
- Pin 4 to Arduino pin 12
- Pin 5 to GND
- Pin 6 to Arduino pin 11
- Pin 11 to Arduino pin 5
- Pin 12 to Arduino pin 4
- Pin 13 to Arduino pin 3
- Pin 14 to Arduino pin 2
- Pin 15 to 5v through a 220 ohm resistor
- Pin 16 to GND
The resistors used to connect pin 3 to GND and 5v can be changed in order to change the contrast of the screen, or can alternatively be replaced with a 10k potentiometer; for this example though we will stick to the 1k and 10k resistors as this provides a good level of contrast.
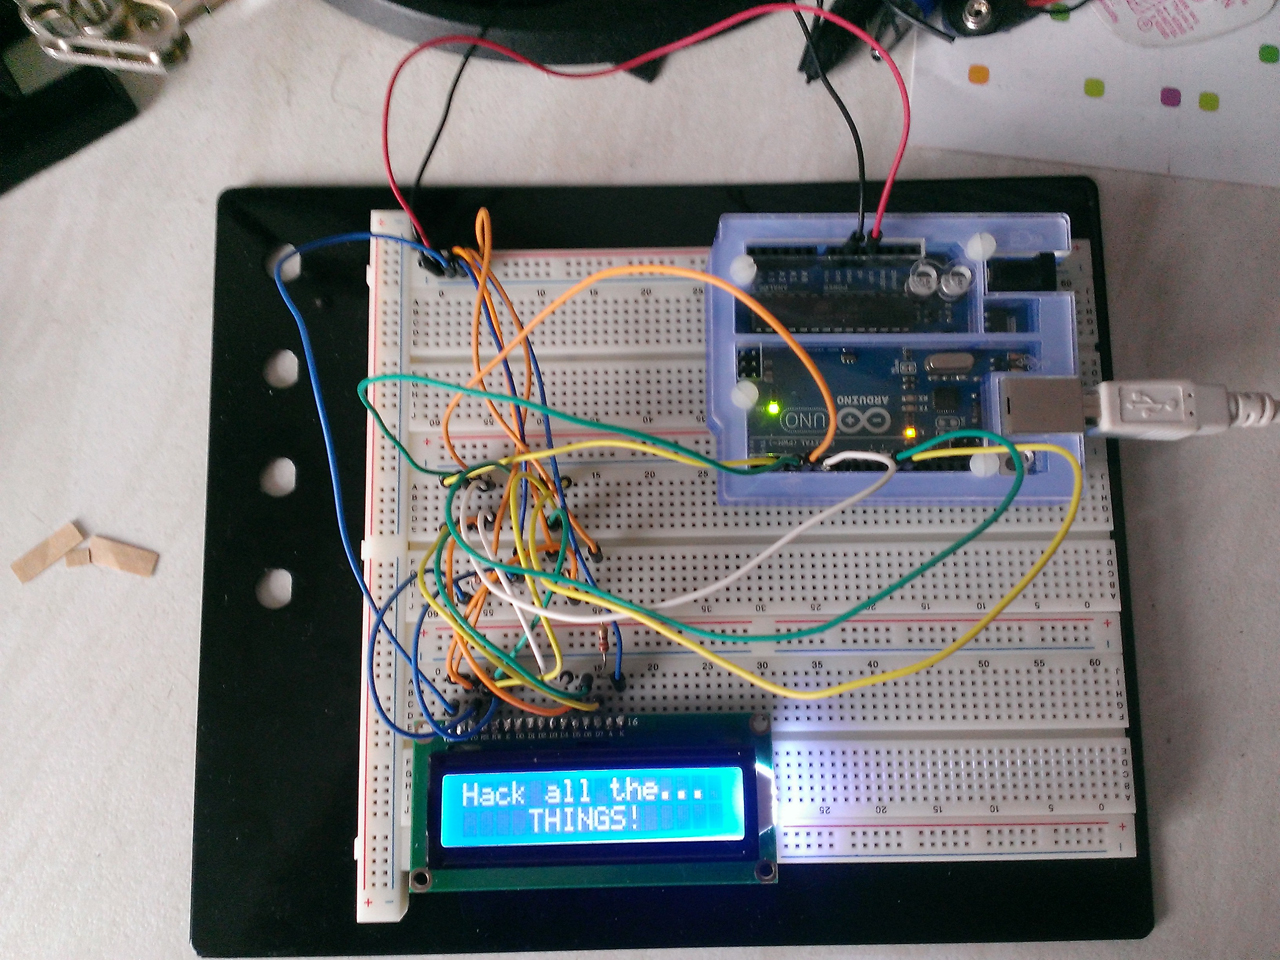
Once finished wiring it up, you should have something that looks something like this (hopefully a bit tidier than mine!):
If you now provide power to your Arduino, you should see your screen power up along side it. However, a blank LCD screen isn’t very impressive or of much use, so we need to put some code behind it to print some text!
Open up the Arduino IDE and paste in the sketch below:
#include <LiquidCrystal.h>

// Setup the LiquidCrystal library with the pin numbers we have
// physically connected the module to.
LiquidCrystal lcd(12, 11, 5, 4, 3, 2);

int lastUpdate = 0;
int currentIndex = 0;
char* lyrics[] = {
  "Drink all the...",
  "     BOOZE!     ",
  "Hack all the... ",
  "    THINGS!     "
};

void setup() {
  // Setup the number of columns and rows that are available on the LCD.
  lcd.begin(16, 2);
}

void loop() {
  // Get the time in milliseconds since the last reset.
  int time = millis();

  // If 800 milliseconds have passed since we last updated
  // the text on the screen, print the next line of the
  // lyrics on the screen.
  if ((time  - lastUpdate) >= 800)
  {
    // Move the cursor back to the first column of the first row.
    lcd.setCursor(0, 0);

    // If we are writing "Drink all the..." or "Hack all the..."
    // then clear the screen and print the appropriate line.
    if (currentIndex == 0 || currentIndex == 2)
    {
      lcd.clear();
      lcd.setCursor(0, 0);
      lcd.print(lyrics[currentIndex]);
    }
    else
    {
      // If we are writing the second line, move the cursor there
      // and print the appropriate line.
      lcd.setCursor(0, 1);
      lcd.print(lyrics[currentIndex]);
    }

    // Increment or reset the current index.
    if (currentIndex == 3)
    {
      currentIndex = 0;
    }
    else
    {
      currentIndex += 1;
    }

    // Update the time that we last refreshed the screen to track
    // when to update it again.
    lastUpdate = time;
  }
}
The LiquidCrystal library that we imported and used in this sketch handles most of the work for us, allowing us to simply specify the strings we want to write to the screen pretty much; in this case flashing some of the lyrics of All The Things by Dual Core.
If you power up the Arduino now and upload the sketch to it, you should have something akin to the below video:
For more information on the JHD162A, you can refer to the datasheet, which you can Download Here.