If you’re dual booting a Windows and Ubuntu desktop, it can feel a bit cumbersome having to wait for GRUB and then manually choosing to boot into Windows. There is a utility packaged with GRUB which can help resolve this, but it requires a bit of setup.
I have used this solution successfully on both Ubuntu 16.04 and 18.04. There is no reason that this solution should not work on any other distribution that is using GRUB, but without testing, I cannot say with absolute certainty!
Updating The GRUB Configuration
The first step, is to update the GRUB configuration. In Ubuntu, this file can be found at /etc/default/grub.
Assuming this file has not been modified already, there should be a variable assignment that reads:
GRUB_DEFAULT=0
Comment out this line, and replace it with:
GRUB_DEFAULT=saved
Changing The Timeout (Optional)
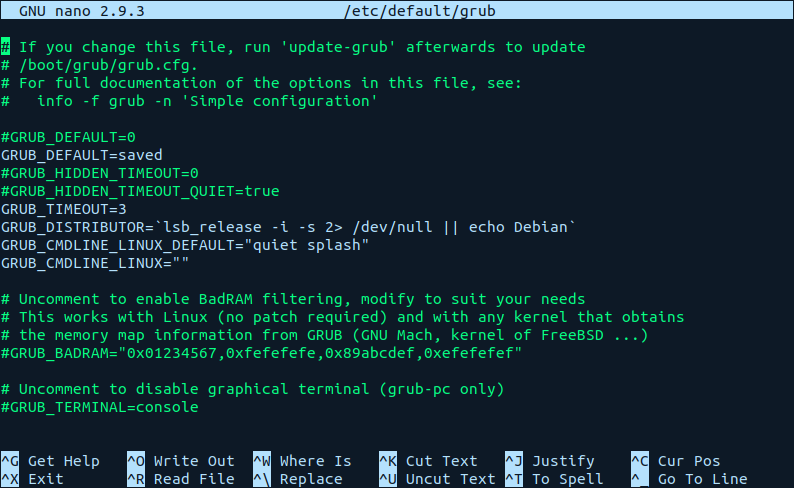
In addition to this, I also commented out the GRUB_HIDDEN_TIMEOUT and GRUB_HIDDEN_TIMEOUT_QUIET options and set the GRUB_TIMEOUT option to a value of 3.
This change makes GRUB boot the highlighted system after 3 seconds if the user does not interact with the GRUB menu (i.e. by changing the selected menu item).
Once the changes are made, you should have a GRUB file that resembles this in some form:

Applying The GRUB Updates
Once the changes have been saved to /etc/default/grub, run:
sudo update-grub
This will update the GRUB menu entries and update the active configuration file.

Creating The Script
Now that GRUB is configured, the script that will be invoked by the shortcut can be created.
Firstly, the name of the menu entry must be confirmed. To do this, run:
grep -i windows /boot/grub/grub.cfg
You should see output akin to the below:

In this screenshot, the menu entry name would be the text that is enclosed within the single quotation marks; i.e. Windows Boot Manager (on /dev/nvme0n1p1) - take note of the value that you see.
Next, create the reboot script - for this example, we’ll place it in /opt/reboot-into-windows. Populate the file with the following contents:
#!/bin/bash
/usr/sbin/grub-reboot "Windows Boot Manager (on /dev/nvme0n1p1)"
/sbin/reboot
As can be seen above, the value found when using grep has been used as the argument for grub-reboot - make sure you replace this with the value that you identified in the previous step.
Lastly, ensure that the script is executable and only writable by the root user by running:
sudo chown root:root /opt/reboot-into-windows
sudo chmod 755 /opt/reboot-into-windows
N.B. it’s very important that only root can write to this file, so don’t skip this step.
Setting Up The Shortcut
Before creating the shortcut, there is one last step that needs to be carried out, and that is allowing the script to be executed using sudo, without a password.
To do this, run the following command, ensuring to replace YOUR_USERNAME with the user you will be logged in as:
sudo echo 'YOUR_USERNAME ALL=(ALL) NOPASSWD: /opt/reboot-into-windows' > /etc/sudoers.d/00-windows-reboot
Important Note: Under no circumstance should you change the above to allow all commands to be run using sudo with no password. This should be limited strictly to /opt/reboot-into-windows and only root should have write permissions to the file. If you do not follow these steps explicitly, you will be lowering the security of your system.
Once the sudoers file has been setup, you can create the shortcut. To do this, create another new file on your desktop (name it whatever you wish), containing the following content:
#!/bin/bash
sudo /opt/reboot-into-windows
Ensure the file is executable by running:
chmod +x ~/Desktop/THE_NAME_OF_YOUR_FILE
Lastly, if you want, you can add an icon to this file by right clicking it, and clicking Properties and then left clicking on the current icon. I used the following Windows 10 icon:

The setup of the shortcut is now complete, and after double clicking should reboot your machine into Windows!
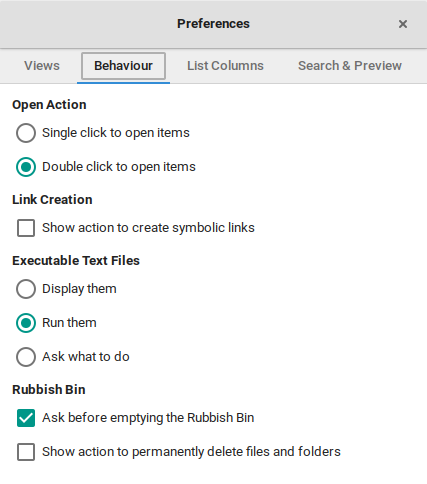
On Ubuntu 18.04, an extra step seems to be necessary, which is setting the default behaviour for executable text files. To do this, open Nautilus (the file explorer), and in the top bar, drop down the “Files” menu and click “Preferences”.
In the window that appears, go to “Behaviour” and ensure that the “Executable Text Files” setting is either “Run Them” or “Ask what to do”.

If you choose “Ask what to do”, as the setting suggests, you will be prompted every time whether you want to view the file or execute it.
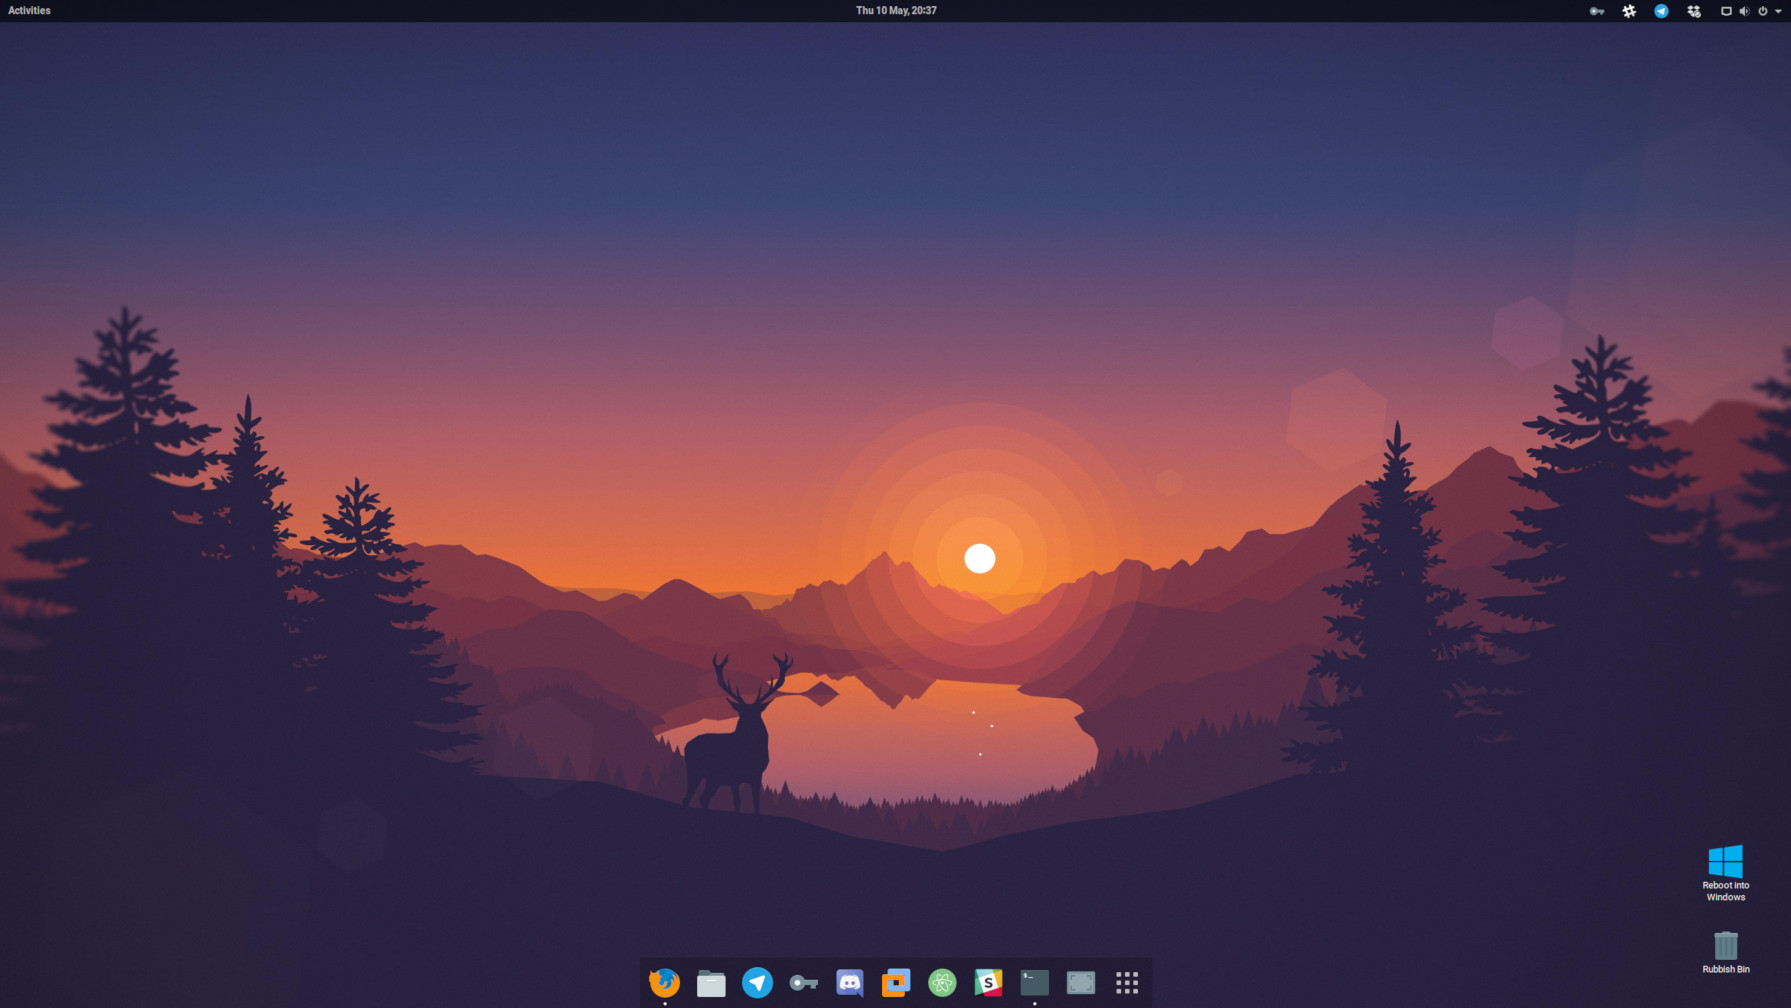
The end result should be something that looks like this:

It should also be noted, clicking the “Reboot into Windows” button will not make it the permanent default. It will only set it as the default selection for that individual reboot; meaning the next time you boot the machine, it will boot into Ubuntu as usual!