This guide will show you how to create a feature that has become a requirement in one of my latest projects; that being an aim assist which will rotate around your character to point in the same direction as where the mouse is on screen.
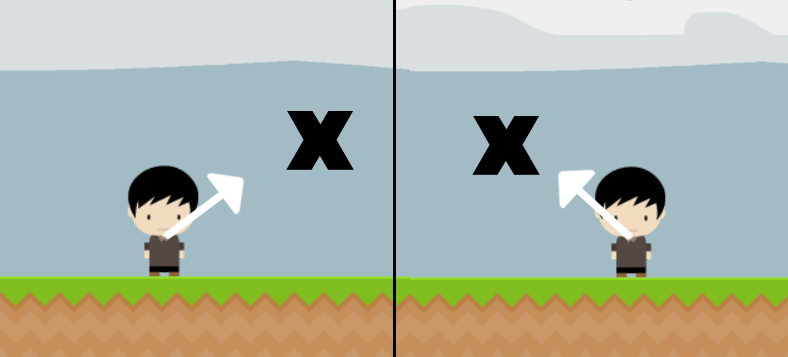
Below are two screenshots which illustrate where the mouse is positioned with a black X, showing how the arrow rotates to point to it:
Any old arrow graphic will do for the purpose of this guide, but for convenience’s sake the one I am using in the illustration above can be found by Clicking Here (it is all white, so it may look like it hasn’t loaded, but just save it, it’ll be fine).
Setting up our objects in Unity
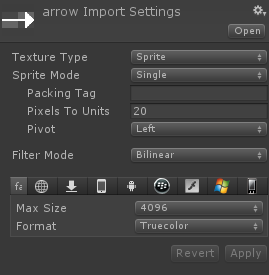
There’s not much we have to do in way of setting up our objects. All that we need to do is import the arrow we intend to use, and set the pivot point to be at the bottom-center of our arrow. If you’re using the arrow I linked above, you can do this by setting the “Pivot” option to “Left” in the Inspector window, as I have made this arrow with the bottom of it on the left hand side:
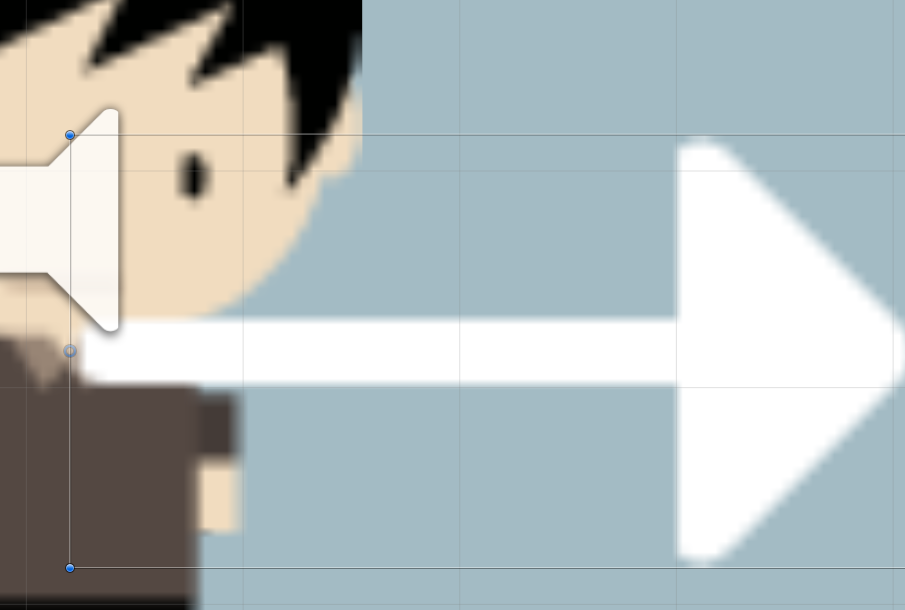
Now, drag the arrow sprite into your scene, and ensure it is a child of your character’s game object so that it’s positioning is always relative to your game object and position it so that the pivot point is in the exact place you want it to rotate around.
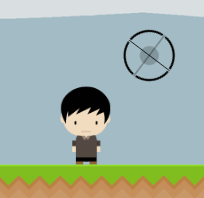
In my case, I wanted the arrow to rotate around the character’s neck, as can be seen below, so I have placed it with the pivot point at the character’s neck. You can see the pivot point in between the top left corner and bottom left corner:
Setting up the script
In your project inspector, create a new script called “AimAssist” (or whatever you prefer, the class for this example will be named AimAssist though) and paste the following code in:
using UnityEngine;
using System.Collections;

public class AimAssist : MonoBehaviour {

    void Start () {
    }

    void Update () {
        Vector3 mouse_pos = Input.mousePosition;
        Vector3 player_pos = Camera.main.WorldToScreenPoint(this.transform.position);

        mouse_pos.x = mouse_pos.x - player_pos.x;
        mouse_pos.y = mouse_pos.y - player_pos.y;

        float angle = Mathf.Atan2 (mouse_pos.y, mouse_pos.x) * Mathf.Rad2Deg;
        this.transform.rotation = Quaternion.Euler (new Vector3(0, 0, angle));
    }
}
To understand what this script does, we first need to wrap our heads around some basic trigonometry (if you don’t care about why this works, you can skip this part, but I’d advise reading and understanding why).
In order to determine the angle our arrow needs to be displayed at, we need to find the arctangent of the mouse’s position on screen; which we do by calling the Mathf.Atan2 method. This method will return the angle in Radians which we can then multiply by the constant value defined in Mathf.Rad2Deg to get the degrees by which we need to rotate the arrow.
The picture below (Source) illustrates visually how the number of radians is calculated using the Mathf.Atan2 method.
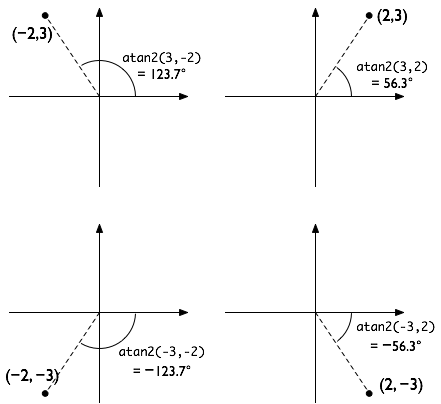
As can be seen in the illustration above, the points passed to the arctangent function are always relative to an origin at point 0,0, which is why before we call the Mathf.Atan2 method in our script, we first find the position of the player on the screen and then deduct that from where our mouse is positioned. The reason we do this is because it gives us a vector which is relative to the character / the arrow game object, rather than to the 0,0 point of the screen itself.
Once we have our angle in degrees, which we stored in the angle variable, we then convert this into a Quaternion, as this is what Unity stores the rotation value in. We do this by calling the Quaternion.Euler method and passing in a new Vector3 object.
You’ll notice we left the x and y parameters of this Vector3 as zero; that is because we don’t want to rotate on the x and y axis.
Now, head back into the scene editor, select your arrow object and drag the AimAssist script onto it in the Inspector window and you’re done!
Assuming you did everything correctly, you should now have something that works similar to the demonstration video below:
You can then of course get rid of the rather ugly looking arrow from this guide and put some more interesting graphics in, as I have done by replacing the arrow with a cross hair:
To achieve the above effect I added an empty game object and added the sprite as a child of that, and applied the script to the game object rather than the script so that the sprite can be positioned away from the pivot point.